29 Creative Easter Egg Wreath DIY Ideas to Brighten Your Spring Decor
Do you ever feel like your front door is just waiting for its big spring debut?
It is that time of year when we all start craving a little bit of magic after a long winter. I know the struggle of wanting to be the “crafty mom” but feeling totally overwhelmed by aisles of glitter and glue guns.
Honestly, last year I tried to make a wreath and ended up with more hot glue on my leggings than on the actual craft. But there is something so special about creating a welcoming entrance that says spring has officially arrived.
Decorating your home for the holidays is about more than just aesthetics; it is about setting a mood for your family and guests. Imagine walking up to your porch and smelling the fresh rain while seeing a pop of pastel color greeting you.
I love the feeling of textured moss, the smooth coolness of faux eggs, and the soft crinkle of burlap ribbons between my fingers. You could go for a classic grapevine base, a whimsical bunny-themed explosion, or even a sophisticated floral arrangement.
Expert designers often suggest that the best wreaths play with varying heights and textures to create visual depth and interest. Just remember to keep the process lighthearted and don’t worry about every single egg being perfectly straight.
Grab a glass of iced tea and let’s look at these stunning designs that will make your home the talk of the neighborhood.
Shabby Chic Floral and Bird Nest
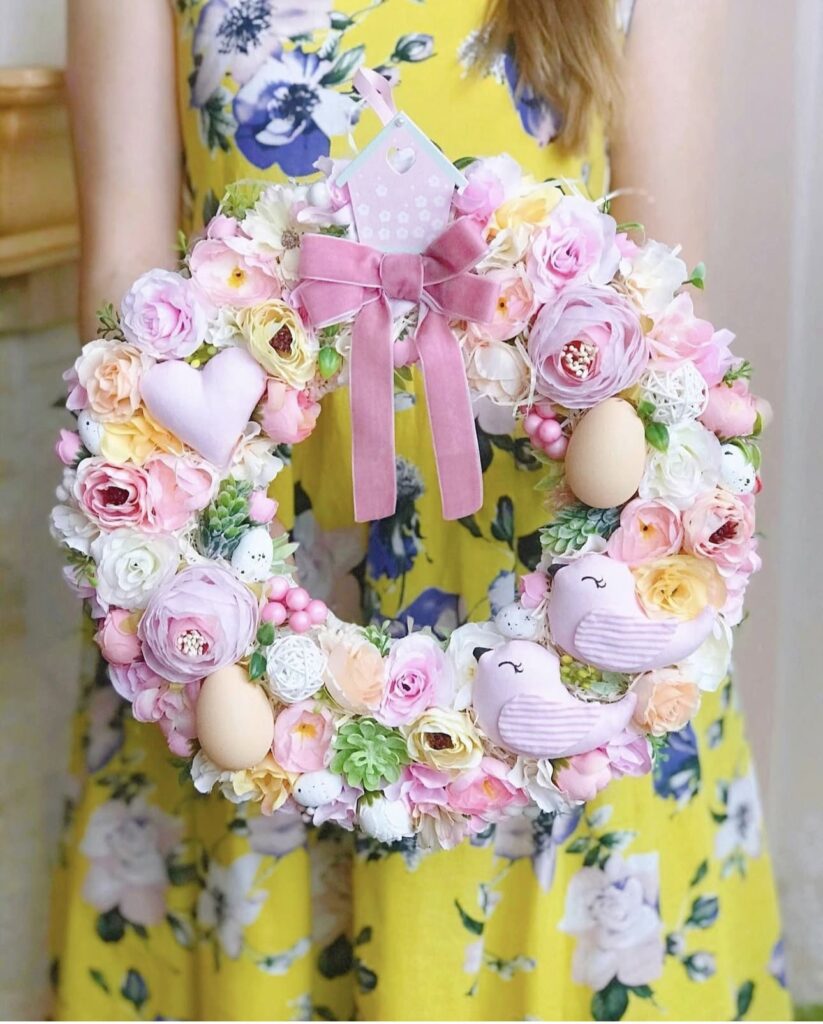
This enchanting wreath is a lush collection of soft pink roses, creamy peonies, and delicate succulents tucked tightly together. Two adorable plush birds sit nestled at the bottom among speckled eggs and a soft velvet bow.
The design works because it uses a monochromatic pastel palette that feels incredibly high-end and romantic. It creates a gentle, nurturing energy that feels like a quiet morning in a blooming garden. You can recreate this by using a foam base and hot-gluing silk flowers as close together as possible.
Bright Tulips and Polka Dot Bunny
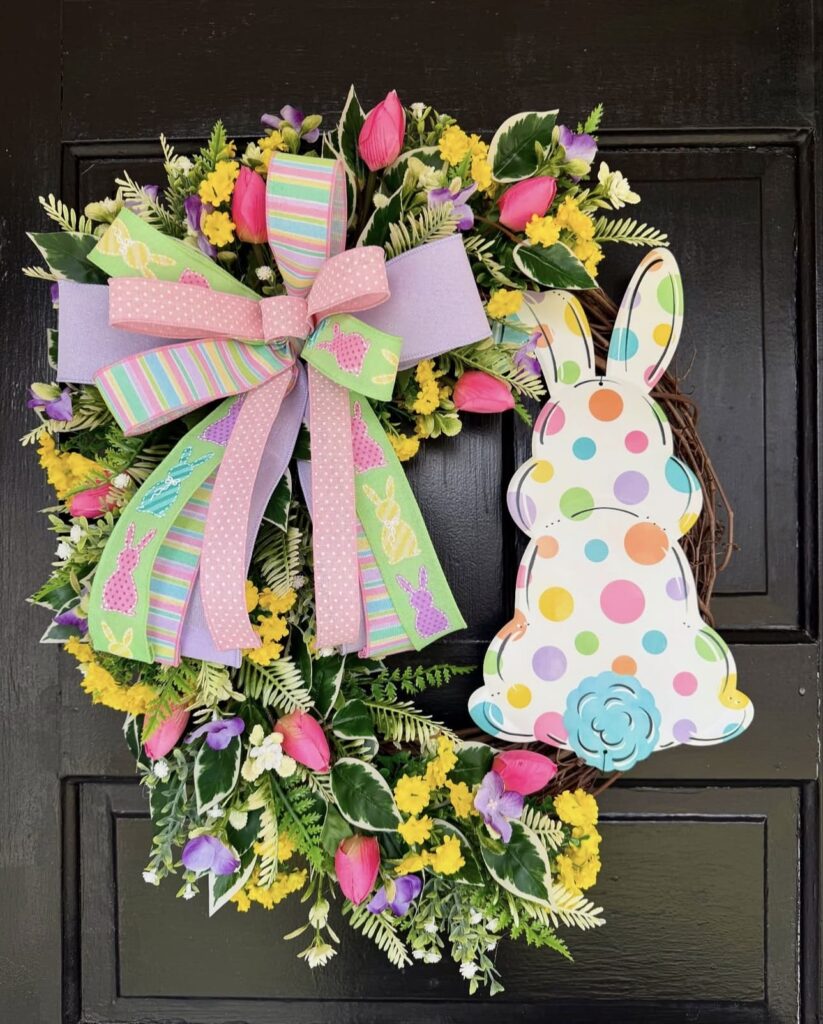
A rustic grapevine base serves as the backdrop for vibrant pink tulips and sunny yellow wildflowers. A large, playful wooden bunny silhouette with colorful polka dots sits off-center, balanced by a massive multi-patterned bow.
The contrast between the dark wood of the door and the neon-bright florals makes the colors truly pop. This wreath radiates high energy and pure childhood joy. Try mixing different ribbon widths and patterns to get that professional, layered bow look.
Whimsical Bunny Butt and Sweets
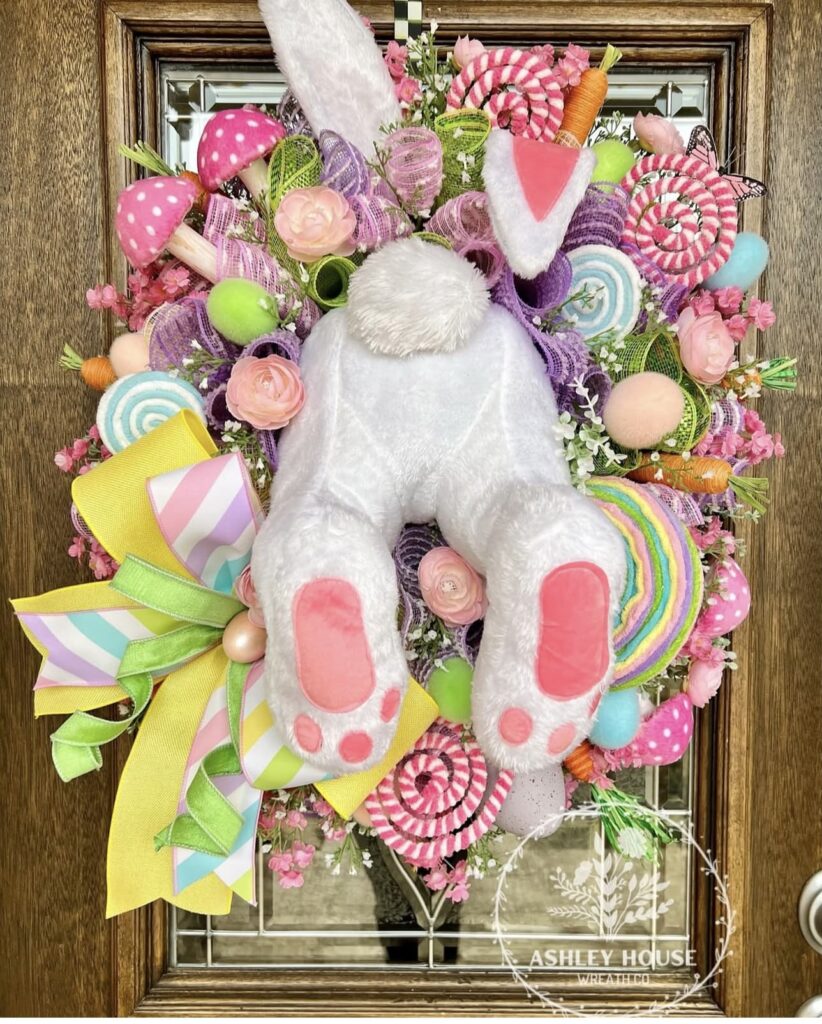
This maximalist masterpiece features a plush bunny “diving” into a sea of mesh curls, faux lollipops, and bright mushrooms. The explosion of lime green, purple, and pink creates a dizzying but delightful candy-land theme.
Visually, the symmetry of the bunny legs provides a focal point amidst the chaotic and fun textures. It feels mischievous and lighthearted, perfect for a house with little ones. Use deco mesh to add significant volume without adding too much weight to your door.
Natural Grapevine with Wooly Bunny
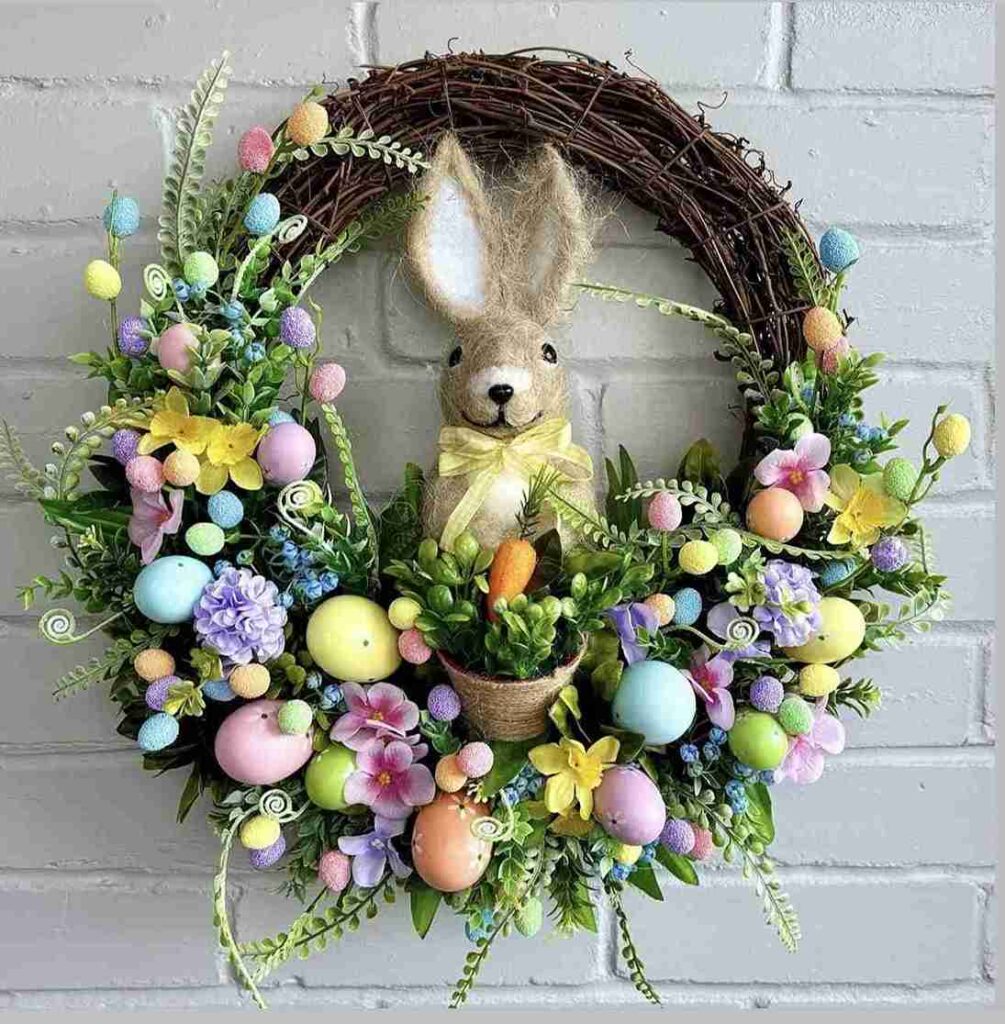
A simple grapevine hoop is partially adorned with lush greenery, lavender sprigs, and a variety of pastel-speckled eggs. In the center sits a charming, textured burlap bunny wearing a yellow bow and tending to a tiny potted carrot.
The “C” shape of the floral arrangement leaves part of the wood exposed, which feels very organic and modern. This design creates a grounded, farmhouse-chic vibe that is welcoming and calm. Secure your central figure with floral wire so it stays upright through spring breezes.
Dapper Moss Bunny with Pink Top Hat
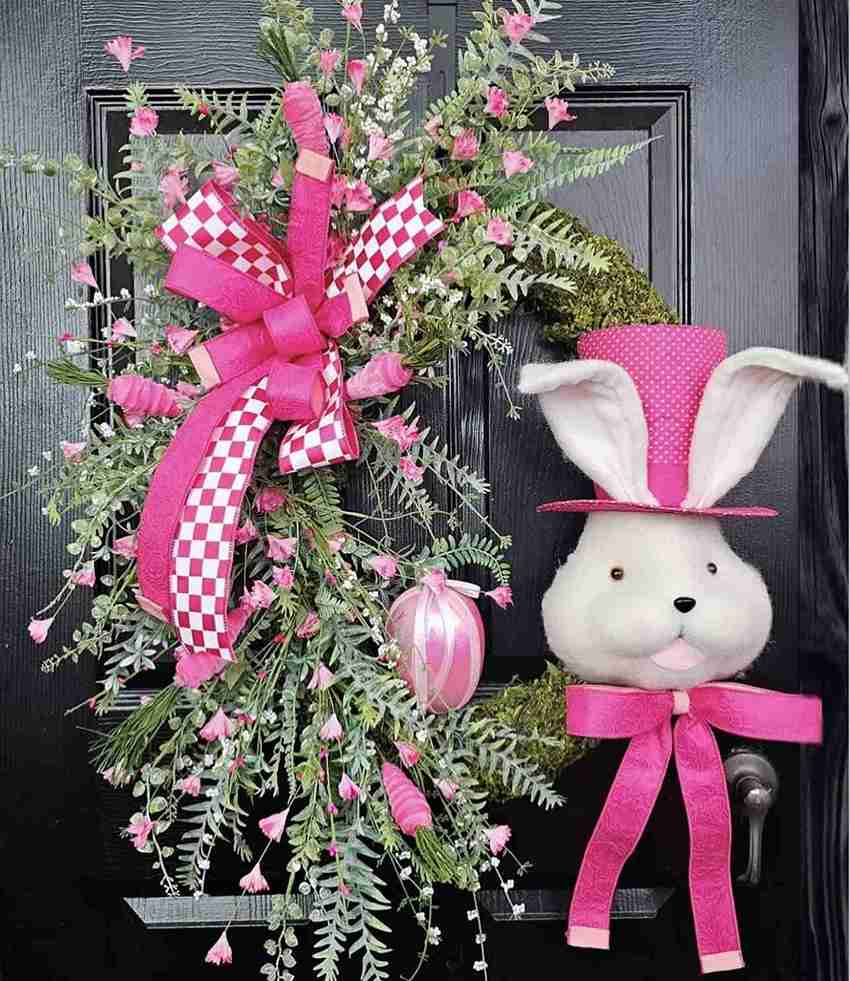
This unique wreath features a moss-covered base shaped like a rabbit, complete with a dapper white bunny face wearing a pink polka-dot top hat. Long trails of pink flowers and checkered ribbons cascade down one side, creating a sense of movement.
The use of negative space in the center of the moss ring keeps the design from feeling too heavy. It feels sophisticated yet playful, like a character from a storybook. Stick to a strict two-color theme like moss green and bright pink for a cohesive look.
Fluffy Bunny Bottom in Lavender
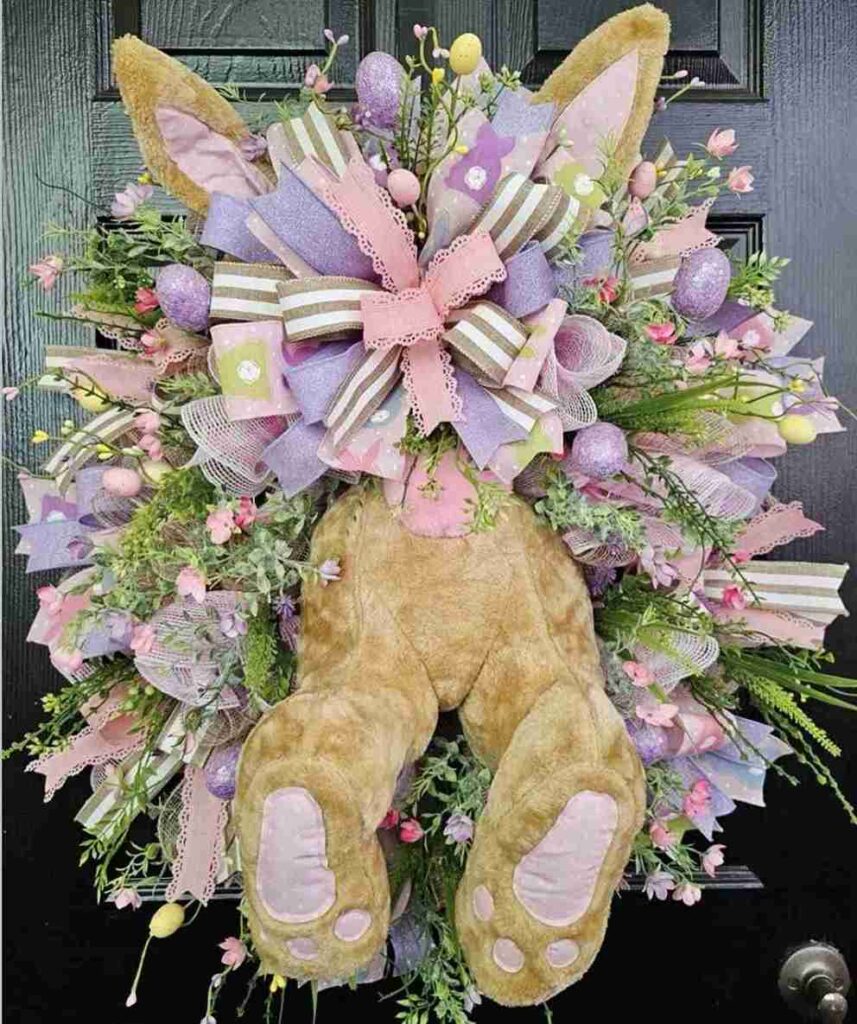
Huge tan bunny ears and a fluffy tail peek out from a dense arrangement of purple glitter eggs and striped ribbons. The soft textures of the plush elements contrast beautifully with the shimmering, hard surfaces of the decorative eggs.
This design works because the oversized elements create a sense of scale that is very trendy on Pinterest. It evokes a feeling of warmth and humor. To get this look, use extra-large “wreath picks” to ensure the ears stand up tall and proud.
Bunny Tail and Spring Roses
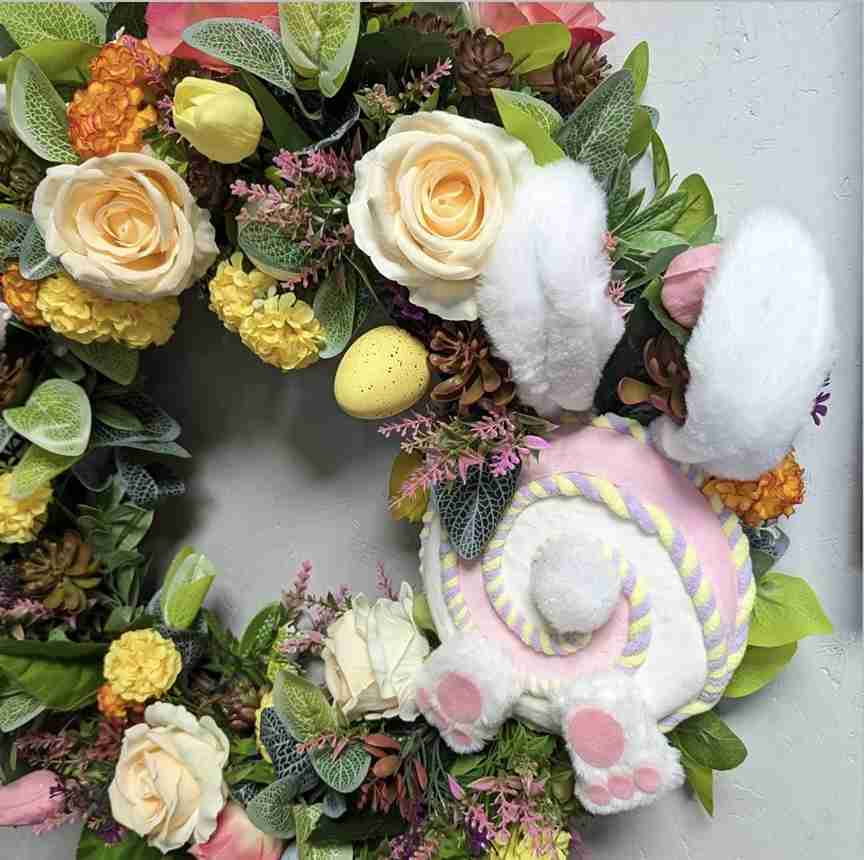
This design features a sweet plush bunny tail nestled among large, creamy yellow roses and vibrant green leaves. Small yellow speckled eggs are tucked into the foliage, adding a hidden surprise for those who look closely.
The circular flow of the flowers creates a very balanced and traditional aesthetic. It feels elegant and classic with just a hint of whimsy. Using oversized silk roses allows you to fill the space quickly with fewer materials.
Serene Religious Lamb Portrait
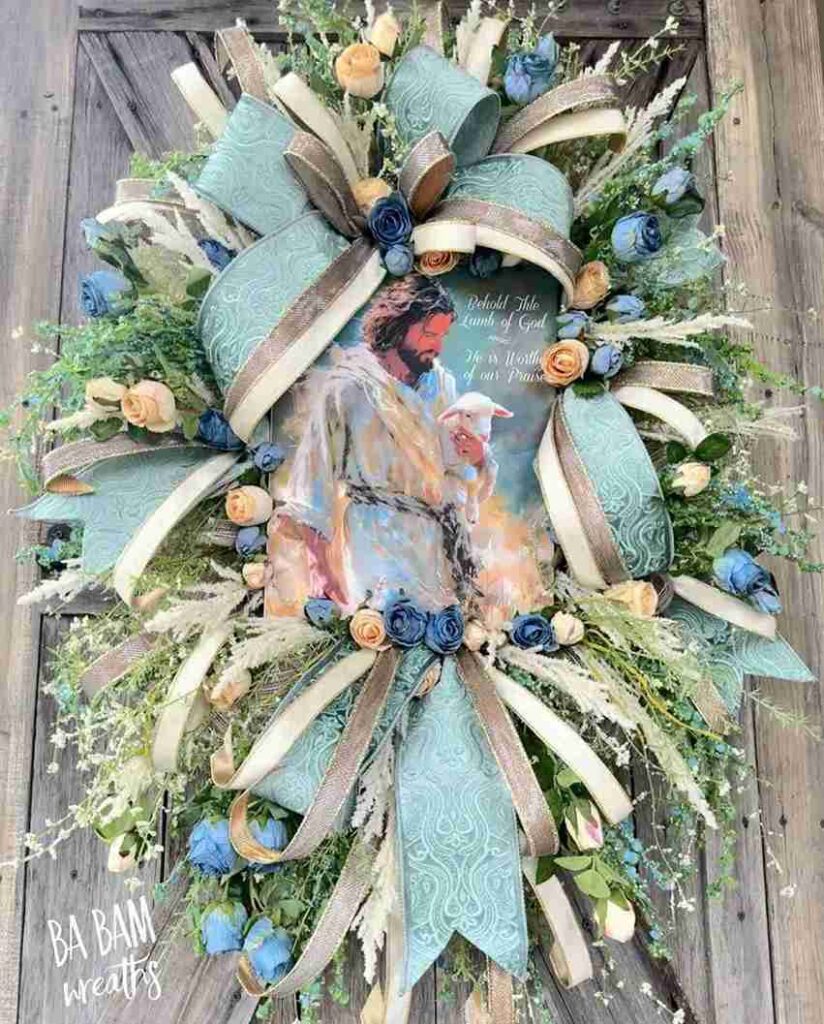
Centered in this ornate wreath is a beautiful portrait of a shepherd holding a lamb, surrounded by pale blue and peach roses. Massive, shimmering champagne ribbons and airy white sprigs create a frame that feels almost ethereal.
The cool tones of the blue roses against the warm gold ribbons create a very balanced, peaceful visual. This wreath creates a reflective and spiritual mood for the holiday season. Use wired ribbon to create those large, architectural loops that hold their shape.
Happy Easter Sign and Carrots
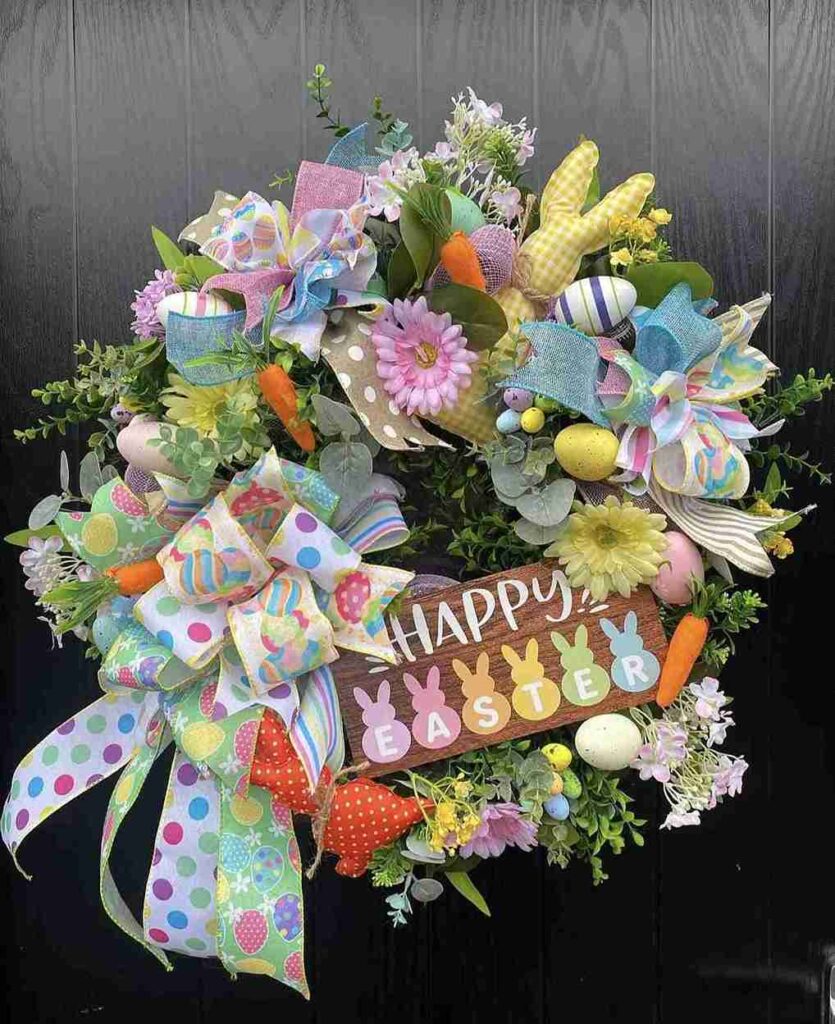
A wooden “Happy Easter” sign is the heart of this busy, cheerful wreath filled with gingham bunnies and bright orange carrots. Polka dot ribbons and daisies are layered throughout to create a festive, maximalist display.
The variety of patterns works because they all share a common color story of blue, green, and orange. This wreath feels like a celebration and is guaranteed to make neighbors smile. A pre-made wooden sign is a great “anchor” piece to build your florals around.
Vibrant Mesh Bunny Dive
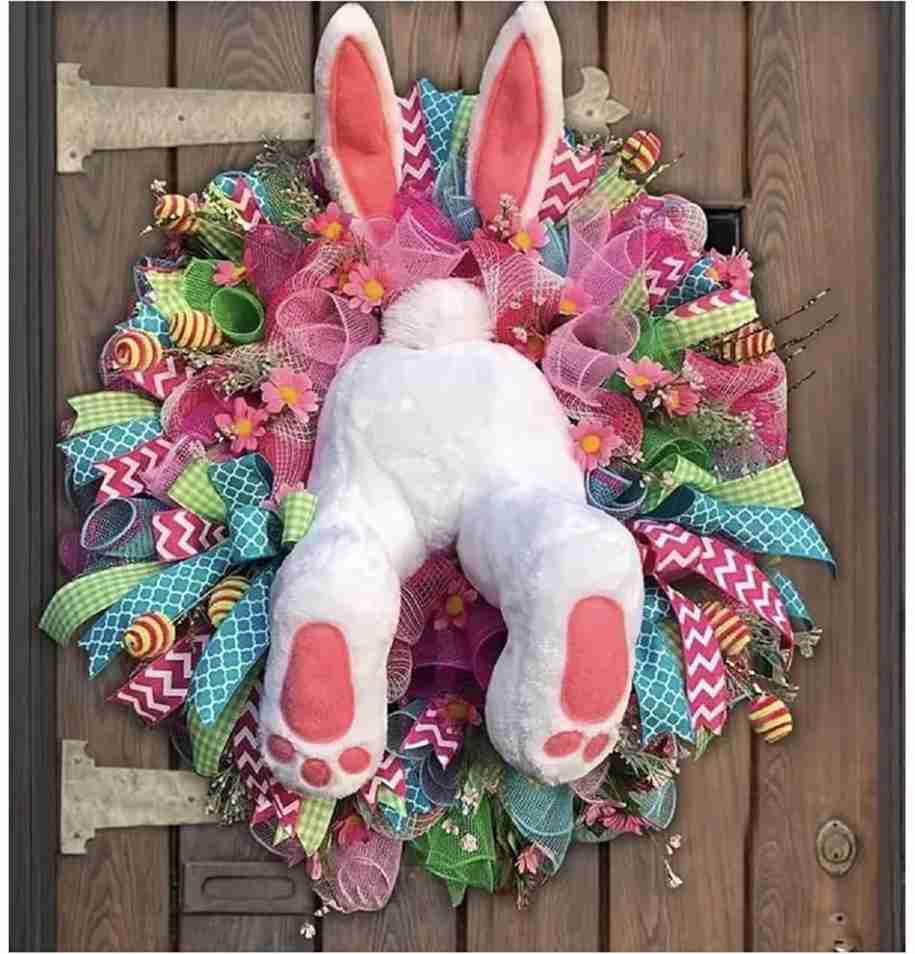
Bright pink and turquoise deco mesh create a voluminous base for a large white bunny bottom with pink paw pads. The zig-zag patterns on the ribbons add a modern, geometric flair to the soft ruffles of the mesh.
Visually, the bright turquoise acts as a perfect complementary color to the hot pink. It creates an energetic and fun atmosphere. Deco mesh is very weather-resistant, making this a great choice for doors without a porch overhang.
Fluffy White Bunny with Sunflowers
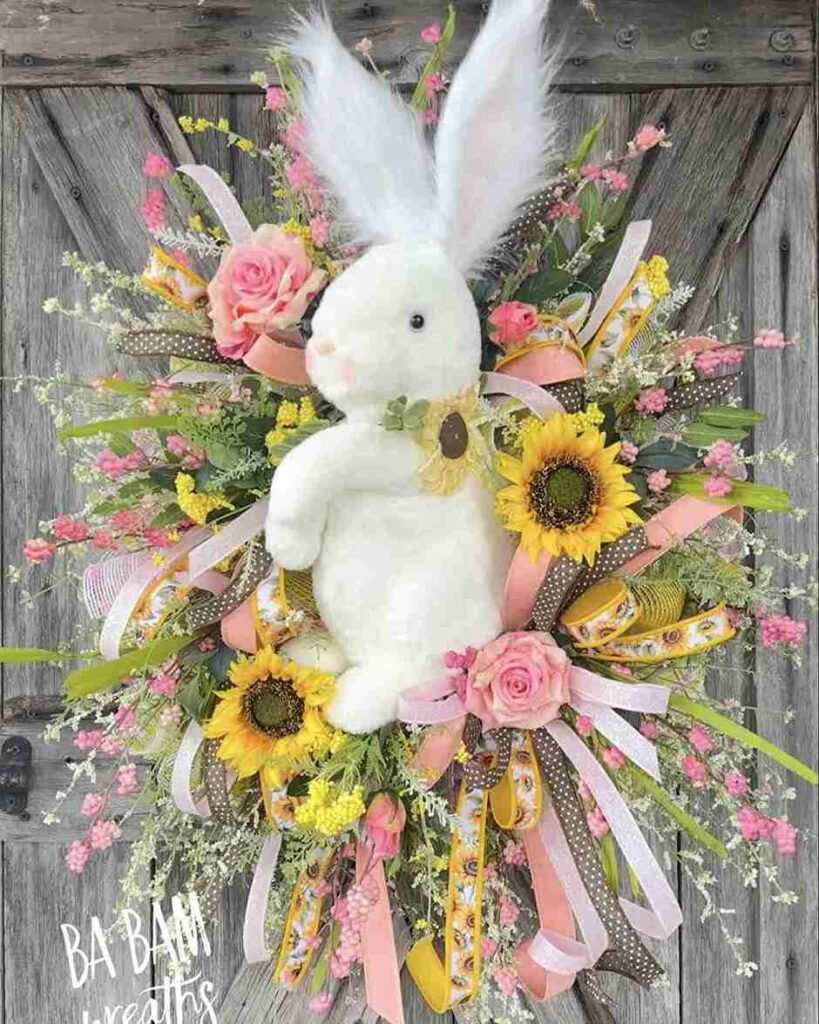
A large, soft white plush bunny sits at the center of a sun-drenched arrangement of sunflowers and pink roses. Brown polka dot ribbons and yellow sprigs add a touch of country charm to the design.
The mix of high-summer sunflowers with spring bunnies creates a unique, transitional look. It feels sunny, bright, and incredibly friendly. Try mixing different types of flowers, like roses and sunflowers, to create a more “wildflower” garden feel.
Hot Pink Gingham and Carrots
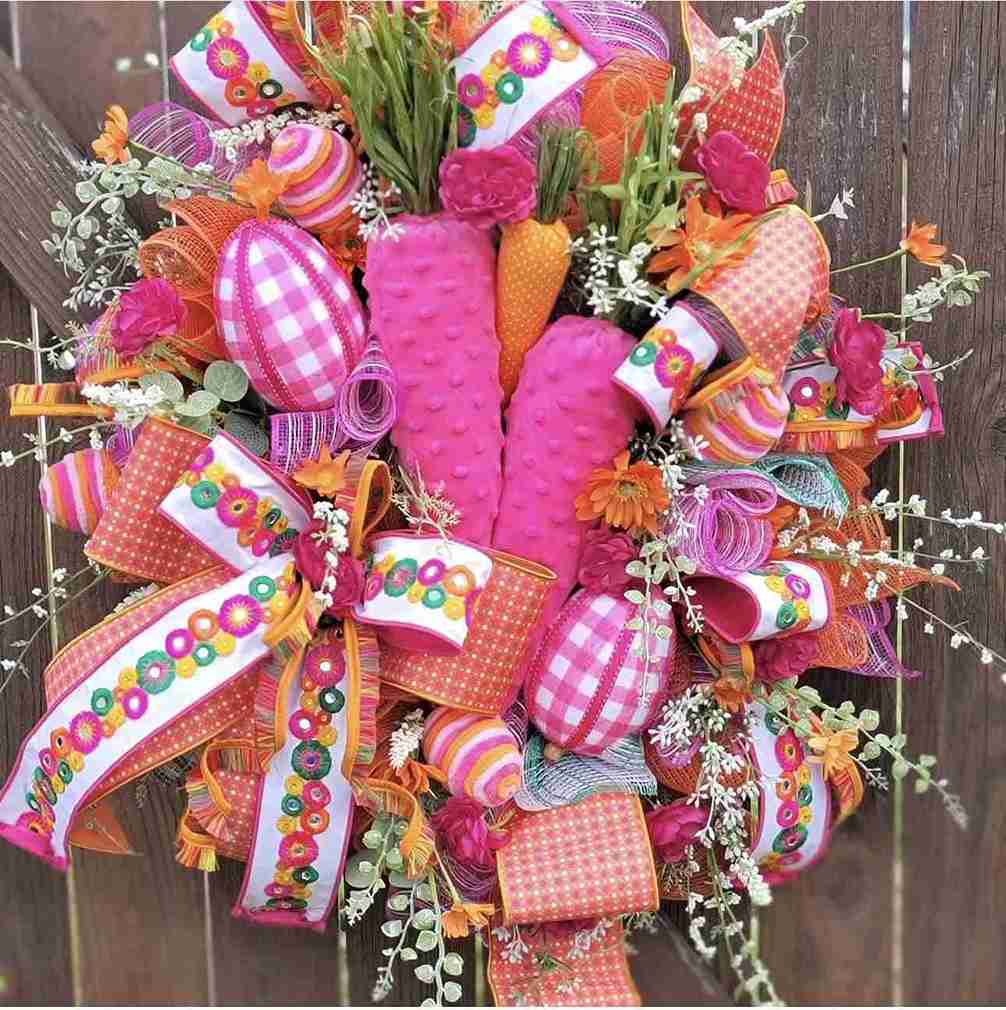
This wreath is an explosion of hot pink and orange, featuring large plush carrots and gingham-patterned eggs. Layered ribbons with colorful embroidered circles add a bohemian and crafty touch.
The warm color palette is bold and stands out perfectly against dark or wooden doors. It creates a feeling of creative energy and excitement. You can use fabric scraps to wrap foam egg shapes if you want to match your specific ribbon patterns.
Pastel Deco Mesh with Bunny Cutout
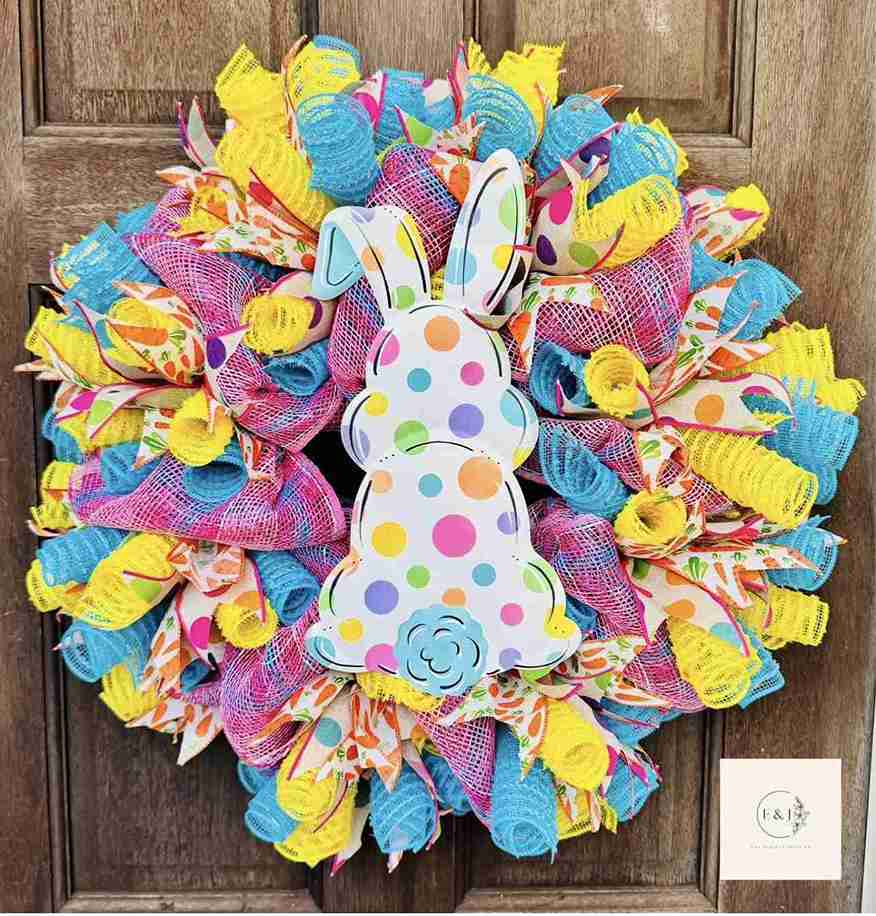
A flat, polka-dotted bunny cutout is centered on a wreath made of tightly curled deco mesh in blue, yellow, and pink. Carrot-patterned ribbons peek out from the curls, adding a thematic touch to the colorful ruffles.
The repetitive texture of the mesh curls creates a very satisfying and organized visual. This design feels youthful and bubbly. Using a flat wooden cutout in the center is an easy way to ensure your wreath stays low-profile and fits between a front door and a screen door.
Rustic Grapevine with Speckled Pastel Eggs
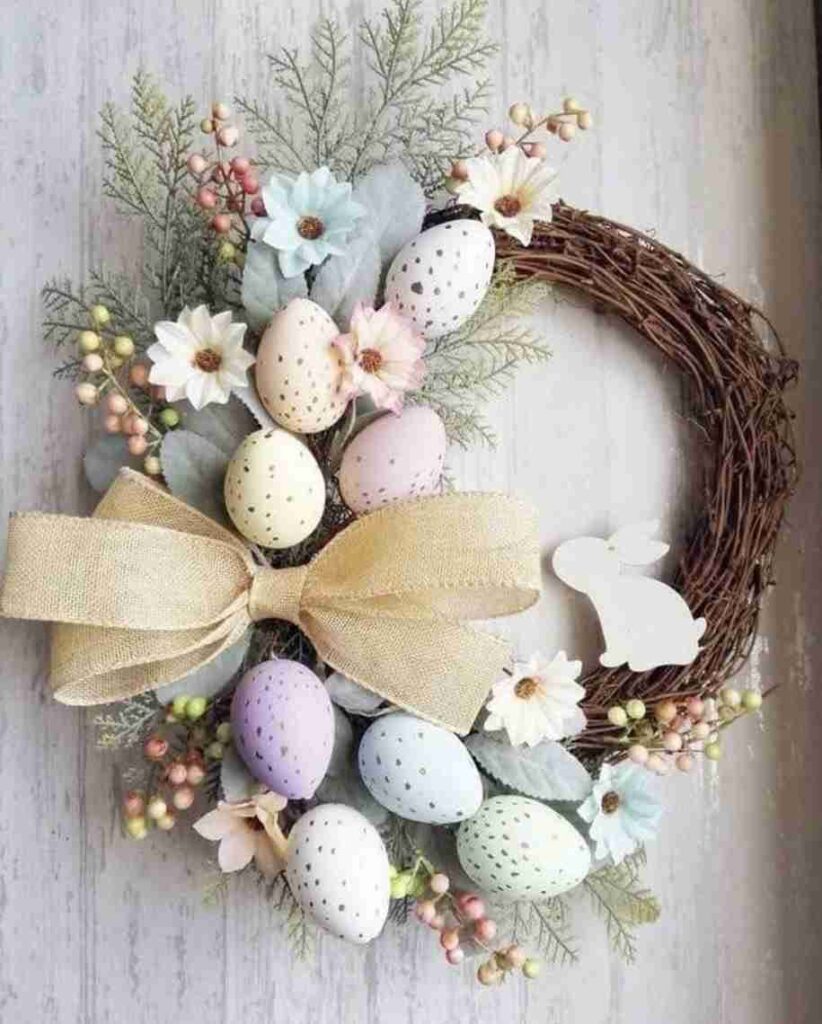
This minimalist design features a dark grapevine base with a cluster of soft, speckled eggs in muted blue, pink, and cream. Delicate white flowers and a simple burlap bow keep the focus on the natural textures of the wood and greenery.
The asymmetric placement of the decor leaves half the wreath bare, which is a very modern and chic design choice. It creates a calm, sophisticated, and earthy mood. This is the perfect DIY for someone who prefers “quiet luxury” over bright colors.
Eucalyptus and Pink Velvet Bunny
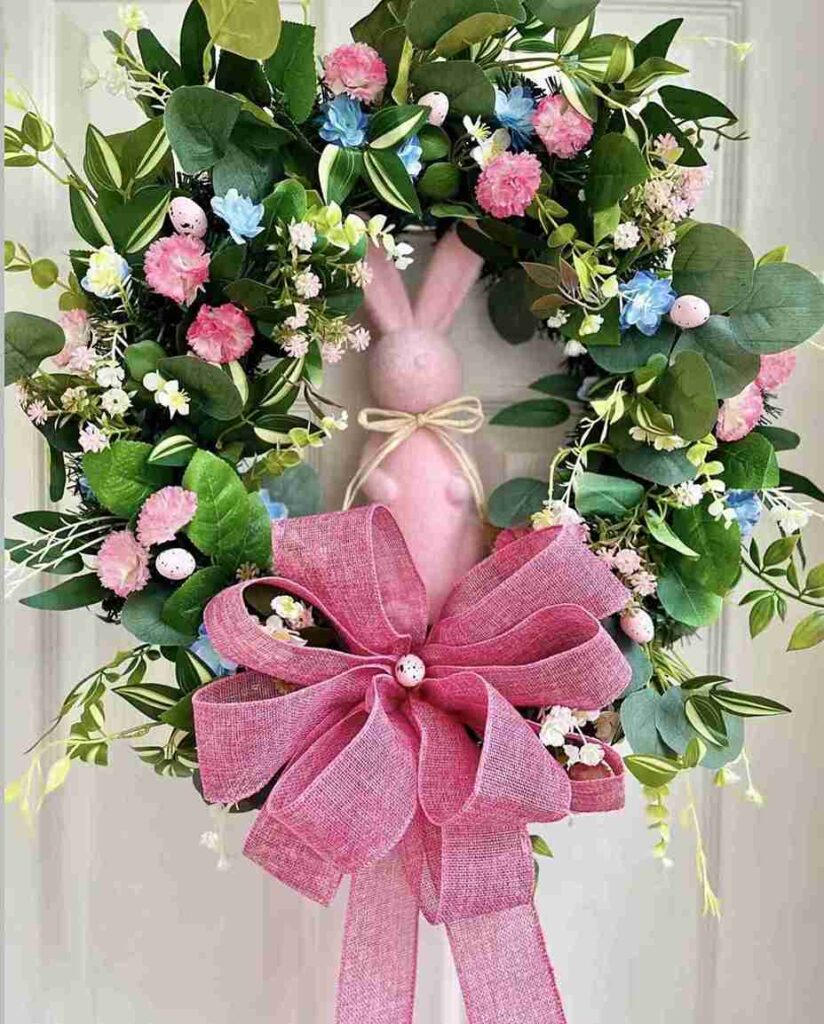
A lush base of eucalyptus and variegated leaves is accented with tiny pink carnations and blue blossoms. A tall, slender pink velvet bunny stands in the center, topped off with a massive, shimmering pink mesh bow.
The silver-green of the eucalyptus makes the soft pinks look incredibly fresh and vibrant.
It feels upscale, feminine, and very “boutique.” If you use real eucalyptus, the wreath will smell amazing every time you open the door.
Surprised Bunny with Giant Carrot
This character-driven wreath features a surprised-looking bunny holding a large pink egg and a giant twine-wrapped carrot.
Bold black and white harlequin patterns on the egg contrast sharply with the pink and orange ribbons. The vertical orientation of this wreath makes it look substantial and impressive.
It creates a whimsical, storybook energy that is very engaging. Use different textures, like twine and satin, to make the individual elements stand out.
Shimmering Roses and Glitter Eggs

Large, high-quality silk roses in lavender, blue, and pink are packed tightly with glittery Easter eggs. Small clusters of berries and eucalyptus leaves fill in the gaps for a full, rounded appearance.
The subtle sparkle on the eggs catches the light beautifully, adding a touch of glamour to the floral base. It feels lush, expensive, and very celebratory.
For a professional look, try to hide the wreath base entirely by overlapping your largest flowers.
Mossy Arch with Plush Bunny

An unusual horseshoe-shaped moss base features a sitting plush bunny at the top and a sprawling garden of lavender roses at the bottom.
A glittery pink and gold striped bow ties the two sections together. The unique shape of the base immediately draws the eye and feels very custom.
It evokes a feeling of a secret garden gate. You can find pre-shaped moss forms at most craft stores to make this structure easy to replicate.
Woven Willow with Pastel Half-Moon
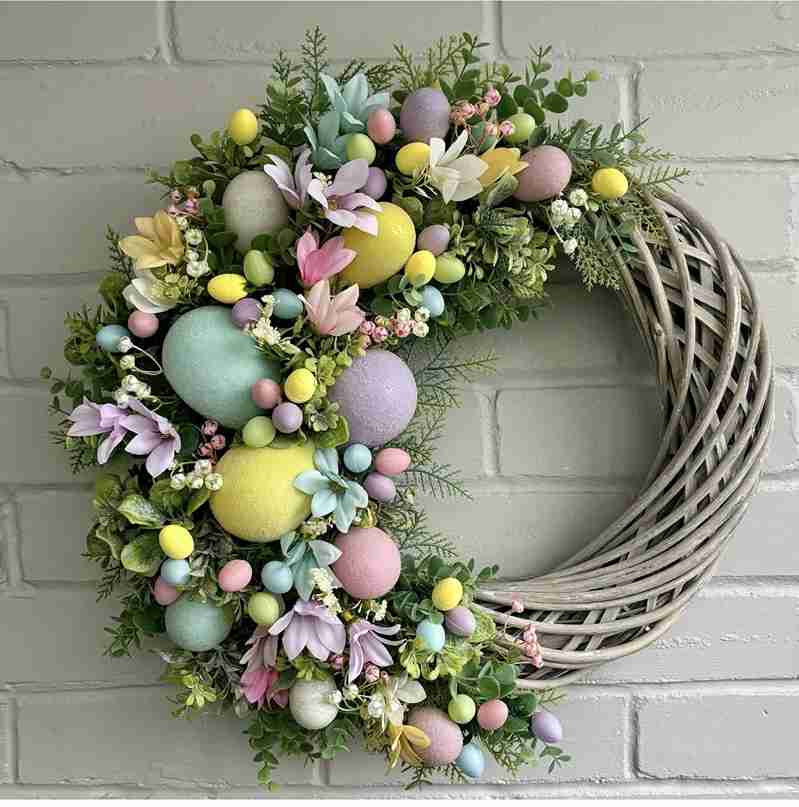
A grey-toned woven willow wreath is decorated on one side with an abundance of large pastel eggs and spring greenery. The eggs have a matte, stony texture that looks beautiful against the soft silk lilies and wildflowers.
The “half-moon” design is very popular right now because it looks artistic and intentional. It creates a mood of modern elegance and seasonal freshness. Use varying sizes of eggs to create a “cascading” effect from the center of the cluster.
I hope these ideas gave you the spark you needed to start your own spring crafting journey. Whether you go for the over-the-top bunny butt or the simple, elegant grapevine, your home will feel so much more “you” with a handmade touch.
Don’t be afraid to mix and match styles until you find the one that makes your heart happy. Happy crafting and may your front door be the prettiest on the block.
Would you like me to create a step-by-step shopping list for one of these specific wreath styles?